If you are looking for an easy and productive flute-making guide, you are in the right place!
Also, you must be into crafts and love making creative objects. That’s great! We are glad you are here.
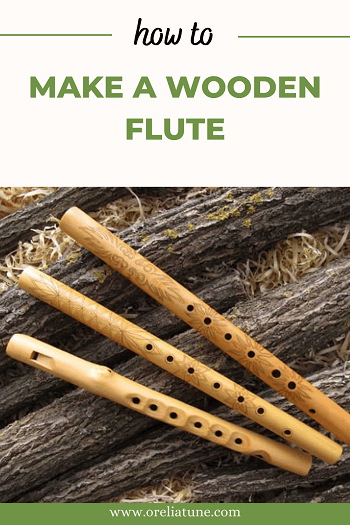
You can perform different DIY but planning to make a wooden flute has another level of exhilaration. You must be interested in music and the musical instrument as well.
The flute is one of the fantastic instruments. If you plan to explore your DIY skill, to keep one flute in your collection made by you, our guide will help you thoroughly make that happen.
We will explain the steps for making a flute with wood for some essential aspects. Let’s start!
RELATED:
Supplies You Will Need
- An elder branch, or a branch from Sambucus Nigra
Why This Wood?
We are handling tree branches, and we have only incorporated simple craft tools for the flute-making process. It would be best if you select wood that has a softcore. That way, it will be easier for you to make the inside hollow of a branch.
If we were making a bamboo tree, we wouldn’t have to worry about making the hole inside. There are some extra steps involved in making a flute out of a tree branch, and it can be a little tricky. Flute making with a bamboo brunch is relatively easier than making one with a wood branch.
The Other Supplies
- Drilling machine
- Around 20-inch auger bit
- 6-7 inch drill bit
- Drill machine holder
- Pocket knife
- 90-grit wheel
- Pencil or marker
- Sand Paper
- Epoxy
Let’s start with the wood-flute-making process.
Step 1: Collecting The Wood

The first thing you need to do is collect the Elder branch. You can visit raw-materials shops for craftwork. You might find the branch but if you don’t opt for online shops.
Tree branches are readily available on Etsy. Moreover, they sell both green and dry branches.
We suggest you get a dry Elder branch for this project. You should collect two of them because theirs is always a possibility of ruining the first one.
But if you are confident you can buy one branch. You should collect a branch that is around 20 to 26 inches.
Step 2: Making The Branch Hollow
This step is a little elaborated; it should also be performed carefully as you will deal with sharp objects. For emptying a branch, some people have specialized tools. Our guide is for the one who doesn’t have a simple tool for the hollowing process.
Still, we can help you make your handy version. In other words, to make the hole, you can use the drill machine, auger bit, and the drill machine stand. Let’s set the drill machine first.
Setting The Drill Machine
As you practice crafts all the time, you might already have a wide table or some long pieces of wood in your workshop.
Undoubtedly, a table is there, so clamp the drill machine stand on the edge of the table, and set the drill machine on the stand by keeping the drilling mechanism upward.
Drilling The Branch
Now, set the auger bit on the drilling end. Then, plug in the drilling machine and carefully hold the branch on the drill bit.
Press down the branch, and keep it drilling until the full drill bit is all the way inside the branch. Drill from both sides of both sides to make the top to bottom of the branch hollow.
Note
Don’t take off the drill; you will need it this way to polish the flute.
Step 3: Peeling The Buck Of The Branch
When you are done emptying the inside of the branch, you can peel off the buck. Use the pocket knife to remove the buck. Do it cautiously, or you might slash yourself.
Also, don’t peel off your direction to avoid any accidents. Work smartly, hold the branch forward, and peel off in your opposite direction.
Step 4: Polishing The Branch
To smooth out the upper body of the branch, install the 90-grit wheel on the drill machine. You could use sandpaper and even out the outside of the branch by your hand.
This way, it can take longer; also, it will be hard on your hand to smooth out the branch.
Note
Branches aren’t that soft, and it takes considerable energy to make them perfect from every side when you use sandpapers. Your hand will get tired, and you won’t be able to do other work.
Hence, you will have to continue with the flute the next day. Anyway, a grit wheel will help you to finish this project earlier and effortlessly.
If you see any cracks on the body after polishing, you can put some epoxy on the slits. It will enhance the look of the flute as well.
Step 5: Making Holes In The Flute’s Body
To make holes in the body, you need to disengage the drill machine from the stand and install a 6-7 inch drill bit on the drill.
When your drill machine is ready, you need to mark the flute’s body for making holes with the right distance between them. Go over the section below to learn about the measurement.
Measurements For The Flute Holes
To make the mouthing hole, leave 4 inches from the beginning of the flute and mark the spot for the hole.
Now, for fingering holes, with at least a 4-inch distance mark for the 1st fingering hole. Then, mark for 5-6 more holes with 2-inch gaps. You can alter the measurement by a couple of centimeters if you want.
But, for the 20-inch flute measurement, we are providing the practical one. You can still increase or decrease the distance if you want because flute-makers don’t have any hard-and-fast rules for measurements.
Drilling On The Mark
Next, you can start drilling on the marks that you have made on the flute’s body. Try to go slow while making the holes; you might crack the body. After making holes, use sandpaper to remove any sharp edges from the holes.
Additional Step: Decorating The Flute
Your wooden flute is ready. You can paint it or make some traditional fire-burn design. We are leaving the beautification process up to you.
Final Thoughts
Craftworks are exciting, and making some musical instruments got to be uplifting! We hope you get to make a fabulous wooden flute with your hand with the help of this guide.